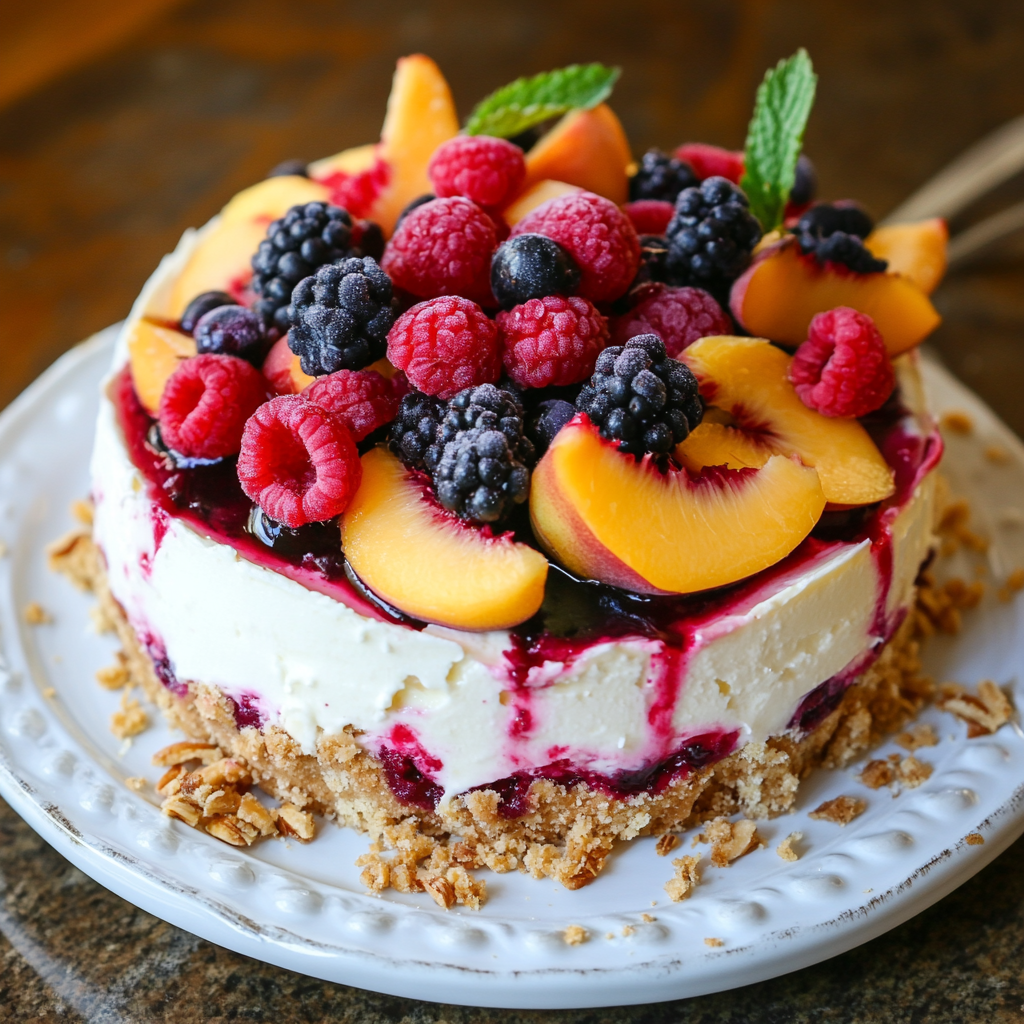
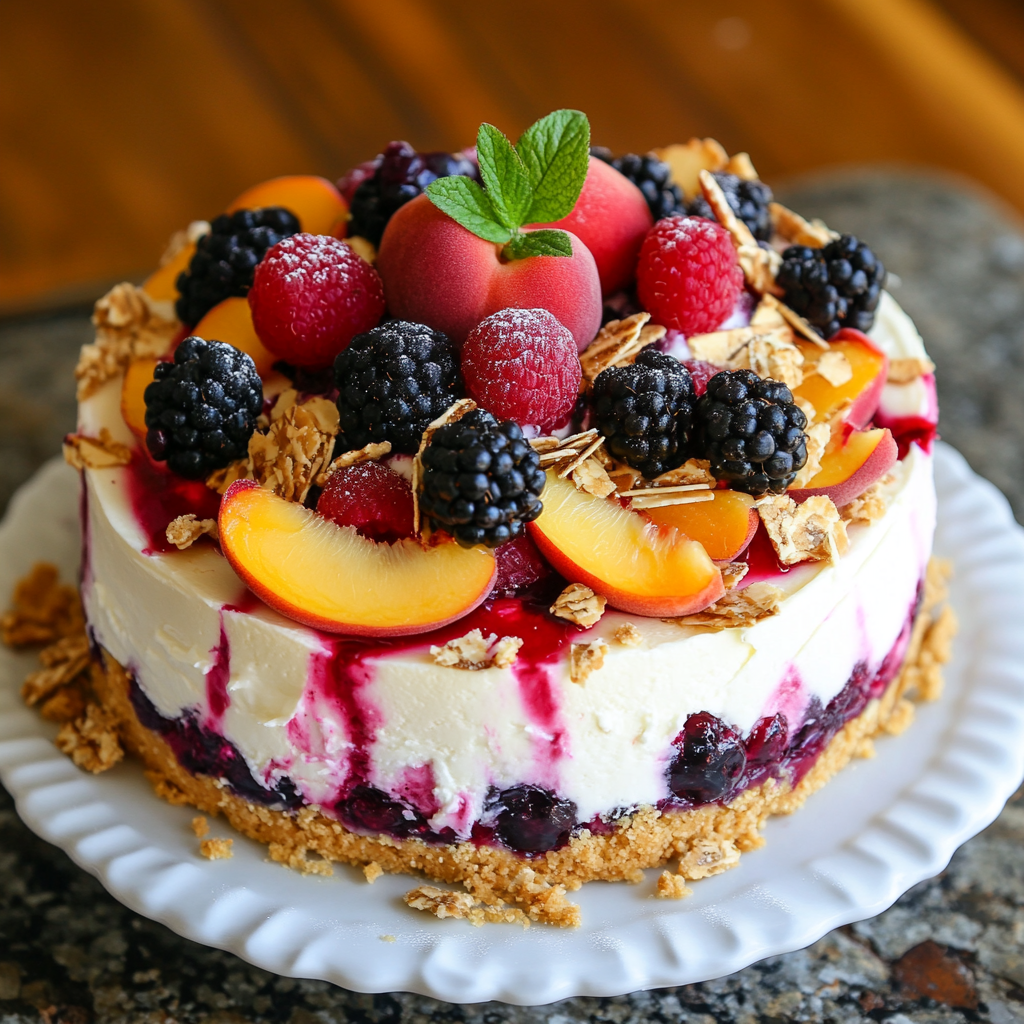
Summer Berry and Peach Cheesecake
This recipe brings together the creamy richness of a classic cheesecake with the vibrant, fresh flavors of summer berries and sweet peaches. The result is a dessert that is both decadent and refreshing, perfect for any occasion from backyard barbecues to elegant dinner parties.
Why You’ll Love This Recipe
This Summer Berry and Peach Cheesecake is a guaranteed crowd-pleaser for several reasons:
- Flavor Explosion: The combination of the tangy cream cheese filling, sweet berries, and juicy peaches creates a symphony of flavors that dance on your palate. Each bite is a delightful experience.
- Texture Contrast: The smooth, velvety cheesecake filling contrasts beautifully with the crunchy graham cracker crust and the soft, succulent fruit topping. This textural variety adds another layer of enjoyment to the dessert.
- Visually Stunning: The colorful array of berries and peaches arranged on top of the creamy cheesecake makes it a feast for the eyes as well as the taste buds. It’s a dessert that’s sure to impress your guests.
- Easy to Make: Despite its impressive appearance and flavor, this cheesecake is surprisingly easy to make. With simple ingredients and straightforward instructions, even novice bakers can achieve perfect results.
- Perfect for Summer: The light and refreshing flavors of this cheesecake make it the ideal dessert for warm summer days. It’s a delicious way to celebrate the season’s bounty.
Introduction
Summer is a time for fresh, vibrant flavors, and this cheesecake captures the essence of the season perfectly. The creamy, dreamy filling is infused with the bright, tangy flavors of ripe berries and sweet peaches. This dessert is a showstopper that’s sure to impress, and it’s surprisingly simple to make. Whether you’re hosting a summer gathering or simply want to treat yourself, this Summer Berry and Peach Cheesecake is the perfect choice. So, gather your ingredients, preheat your oven, and get ready to create a dessert that will transport you to a sunny summer paradise.
Ingredients:
- 1 ½ cups graham cracker crumbs
- ¼ cup granulated sugar
- ½ cup (1 stick) unsalted butter, melted
- 24 ounces cream cheese, softened to room temperature
- 1 cup granulated sugar
- 1 teaspoon vanilla extract
- 3 large eggs
- 1 cup sour cream
- 1 cup fresh mixed berries (strawberries, blueberries, raspberries), washed and patted dry
- 2 ripe peaches, pitted and sliced
Preparation:
Step 1: Prepare the Crust
Preheat your oven to 325°F (163°C). Lightly grease a 9-inch springform pan. In a medium bowl, combine the graham cracker crumbs, ¼ cup sugar, and melted butter. Mix well until the crumbs are evenly moistened. Press the mixture firmly into the bottom of the prepared springform pan, creating an even crust.
Step 2: Make the Cheesecake Filling
In a large mixing bowl, beat the softened cream cheese with an electric mixer until smooth and creamy. This is a crucial step for achieving a lump-free cheesecake, so take your time and ensure the cream cheese is thoroughly softened. Gradually add the 1 cup of granulated sugar, beating until well combined and the mixture is light and fluffy.
Step 3: Add the Flavorings
Stir in the vanilla extract. Add the eggs one at a time, mixing well after each addition. Be careful not to overmix at this stage, as overmixing can incorporate too much air into the batter, which can cause the cheesecake to crack during baking. Finally, stir in the sour cream until just combined. The sour cream adds moisture and tanginess to the cheesecake, enhancing its overall flavor and texture.
Step 4: Assemble the Cheesecake
Pour the cheesecake batter evenly over the prepared graham cracker crust. Gently tap the springform pan on the counter a few times to release any trapped air bubbles. Arrange the sliced peaches and mixed berries attractively on top of the cheesecake batter. Feel free to get creative with the arrangement, creating a visually appealing design.
Step 5: Bake the Cheesecake
Bake in the preheated oven for 50-60 minutes, or until the center of the cheesecake is just set. The edges should be slightly golden, and the center should have a slight jiggle. Turn off the oven and let the cheesecake cool inside the oven with the door slightly ajar for about an hour. This slow cooling process helps prevent cracking.
Step 6: Chill the Cheesecake
Once the cheesecake has cooled to room temperature, cover it loosely with plastic wrap and refrigerate for at least 4 hours, or preferably overnight. This chilling time allows the cheesecake to fully set and develop its flavor.
Step 7: Serve and Enjoy
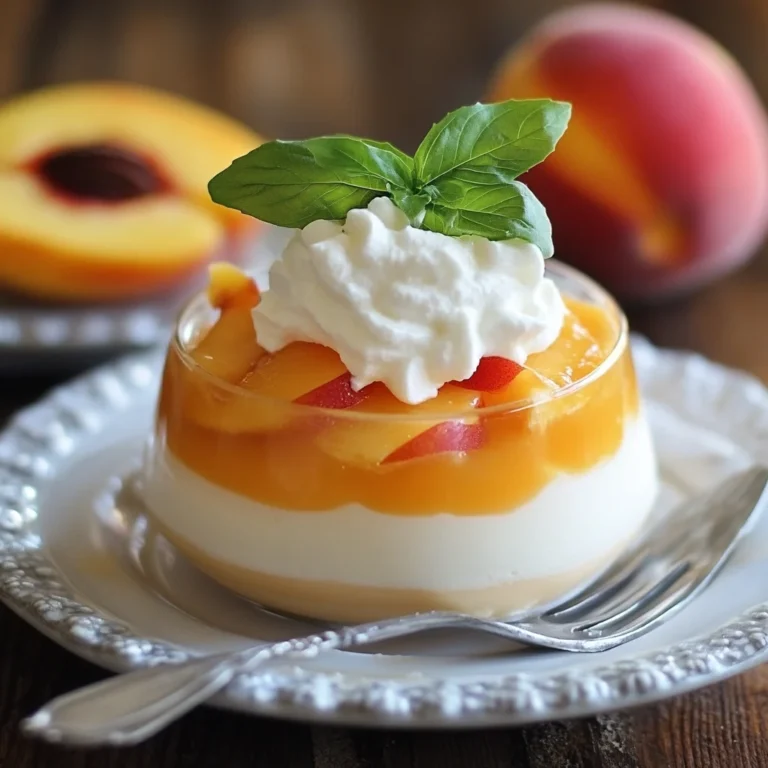
Before serving, carefully remove the sides of the springform pan. Slice the cheesecake with a sharp knife and serve chilled. Garnish with extra fresh berries or a dollop of whipped cream, if desired.
COOKING Rating:
- Ease of Preparation: Medium
- Taste: Excellent
- Presentation: High
Serving Suggestions:
- Serve chilled as a dessert after a summer meal.
- Pair with a glass of sparkling wine or a light dessert wine.
- Garnish with extra fresh berries, whipped cream, or a drizzle of honey.
- Serve with a scoop of vanilla ice cream for an extra indulgent treat.
Tips:
- To prevent cracking, bake the cheesecake in a water bath. Wrap the bottom of the springform pan tightly with aluminum foil to prevent water from seeping in. Place the wrapped pan in a larger roasting pan and fill the roasting pan with hot water until it reaches about halfway up the sides of the springform pan.
- Use room temperature cream cheese for a smooth, lump-free filling.
- Do not overmix the batter, as this can cause the cheesecake to crack.
- Cool the cheesecake slowly to prevent cracking.
- Refrigerate the cheesecake for at least 4 hours before serving to allow it to fully set.
- For a richer flavor, use full-fat cream cheese and sour cream.
- Feel free to experiment with different types of berries and fruits.
- If you don’t have a springform pan, you can bake the cheesecake in a regular baking pan lined with parchment paper.
- To easily remove the cheesecake from the springform pan, run a thin knife around the edges of the cheesecake before releasing the sides of the pan.
Prep Time:
- 20 minutes
Cook Time:
- 50-60 minutes
Total Time:
- At least 4 hours, 10 minutes (including chilling time)
Nutritional Information:
- (Note: Nutritional information is an estimate and may vary based on specific ingredients and serving sizes.)
Calories:
- Approximately 400-450 per slice
Protein:
- Approximately 8-10 grams per slice
Sodium:
- Approximately 200-250 mg per slice
Conclusion
This Summer Berry and Peach Cheesecake is a delightful dessert that’s perfect for any occasion. Its creamy texture, vibrant flavors, and stunning presentation make it a guaranteed crowd-pleaser. Whether you’re a seasoned baker or a novice in the kitchen, this recipe is easy to follow and yields impressive results. So, go ahead and indulge in this summer treat – your taste buds will thank you!
Questions and Answers:
Q1: Can I use frozen berries instead of fresh berries?
A: While fresh berries are ideal for their vibrant flavor and texture, you can use frozen berries if necessary. However, be sure to thaw them completely and drain any excess liquid before adding them to the cheesecake. Frozen berries may release more moisture during baking, which can affect the texture of the cheesecake.
Q2: Can I make this cheesecake ahead of time?
A: Yes, this cheesecake is a great make-ahead dessert. In fact, it’s best to make it at least a day in advance to allow it to fully set in the refrigerator. You can store the cheesecake in the refrigerator for up to 3 days.
Q3: How do I prevent my cheesecake from cracking?
A: There are several things you can do to prevent your cheesecake from cracking:
- Bake the cheesecake in a water bath.
- Use room temperature cream cheese.
- Do not overmix the batter.
- Cool the cheesecake slowly in the oven with the door slightly ajar.
Q4: Can I use a different type of crust?
A: Yes, you can use a different type of crust if you prefer. Some popular alternatives include an Oreo cookie crust, a shortbread crust, or a gingersnap crust. Simply adjust the recipe accordingly.
Q5: Can I add other fruits to the cheesecake?
A: Absolutely! Feel free to experiment with different types of fruits, such as blueberries, raspberries, strawberries, blackberries, nectarines, plums, or cherries. Just be sure to adjust the amount of fruit to your liking. You can also add a layer of fruit compote on top of the cheesecake for an extra burst of flavor.
Ingredients
Method
- Step 1: Prepare the Crust
- Preheat your oven to 325°F (163°C). Lightly grease a 9-inch springform pan. In a medium bowl, combine the graham cracker crumbs, ¼ cup sugar, and melted butter. Mix well until the crumbs are evenly moistened. Press the mixture firmly into the bottom of the prepared springform pan, creating an even crust.
- Step 2: Make the Cheesecake Filling
- In a large mixing bowl, beat the softened cream cheese with an electric mixer until smooth and creamy. This is a crucial step for achieving a lump-free cheesecake, so take your time and ensure the cream cheese is thoroughly softened. Gradually add the 1 cup of granulated sugar, beating until well combined and the mixture is light and fluffy.
- Step 3: Add the Flavorings
- Stir in the vanilla extract. Add the eggs one at a time, mixing well after each addition. Be careful not to overmix at this stage, as overmixing can incorporate too much air into the batter, which can cause the cheesecake to crack during baking. Finally, stir in the sour cream until just combined. The sour cream adds moisture and tanginess to the cheesecake, enhancing its overall flavor and texture.
- Step 4: Assemble the Cheesecake
- Pour the cheesecake batter evenly over the prepared graham cracker crust. Gently tap the springform pan on the counter a few times to release any trapped air bubbles. Arrange the sliced peaches and mixed berries attractively on top of the cheesecake batter. Feel free to get creative with the arrangement, creating a visually appealing design.
- Step 5: Bake the Cheesecake
- Bake in the preheated oven for 50-60 minutes, or until the center of the cheesecake is just set. The edges should be slightly golden, and the center should have a slight jiggle. Turn off the oven and let the cheesecake cool inside the oven with the door slightly ajar for about an hour. This slow cooling process helps prevent cracking.
- Step 6: Chill the Cheesecake
- Once the cheesecake has cooled to room temperature, cover it loosely with plastic wrap and refrigerate for at least 4 hours, or preferably overnight. This chilling time allows the cheesecake to fully set and develop its flavor.
- Step 7: Serve and Enjoy
- Before serving, carefully remove the sides of the springform pan. Slice the cheesecake with a sharp knife and serve chilled. Garnish with extra fresh berries or a dollop of whipped cream, if desired.