Cannoli Cookie Cups
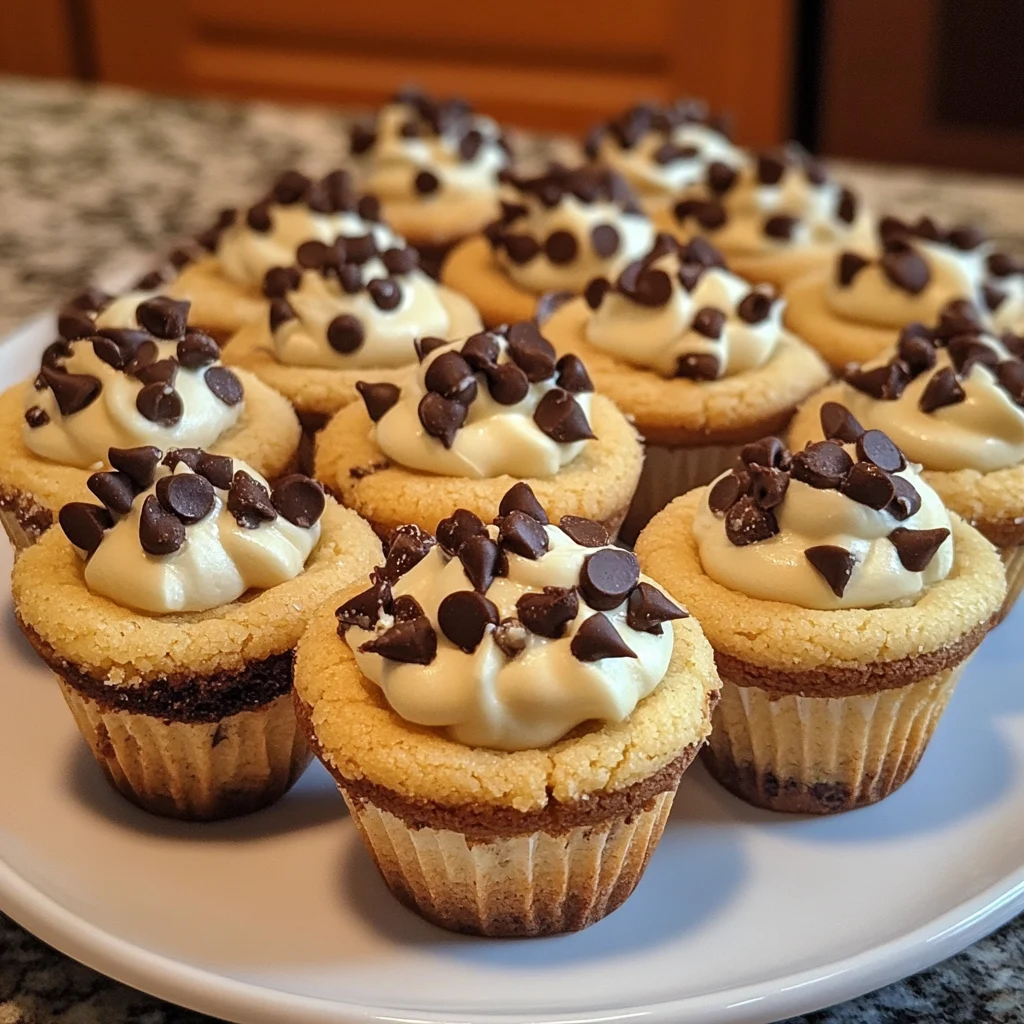
These Cannoli Cookie Cups are a delightful twist on the traditional Italian dessert. They combine the flavors of cannoli with the convenience of a cookie, making them perfect for parties, potlucks, or a simple sweet treat. The crispy cookie base is filled with a creamy, sweet ricotta filling, dotted with mini chocolate chips for an extra touch of indulgence.
Why you’ll love this recipe
This recipe is a winner for several reasons:
- Easy to Make: Forget about deep-frying shells. These cookie cups are baked, making them a healthier and easier alternative to traditional cannoli.
- Portion Control: Each cookie cup is perfectly portioned, making them ideal for serving at gatherings.
- Customizable: You can easily adjust the flavors of the filling and toppings to suit your preferences.
- Delicious: The combination of crispy cookie and creamy filling is simply irresistible.
Introduction
Cannoli are a classic Italian pastry, known for their crispy, fried shells and sweet, creamy ricotta filling. But making traditional cannoli can be a bit of a project, requiring special equipment and some culinary expertise. These Cannoli Cookie Cups offer a simplified and equally delicious way to enjoy the flavors of cannoli. By using a simple cookie dough for the base, you eliminate the need for frying and create a treat that’s easy to make and fun to eat. The filling is a classic ricotta mixture, sweetened with powdered sugar and flavored with vanilla and cinnamon. Mini chocolate chips add a touch of chocolatey goodness. These cookie cups are a crowd-pleaser, perfect for any occasion.
Ingredients:
For the Cookie Cups:
- ½ cup (1 stick) unsalted butter, softened
- ½ cup granulated sugar
- ¼ cup packed brown sugar
- 1 large egg
- 1 teaspoon vanilla extract
- 1 ½ cups all-purpose flour
- ½ teaspoon baking powder
- ¼ teaspoon salt
For the Cannoli Filling:
- 1 cup ricotta cheese, well-drained
- ½ cup mascarpone cheese
- ½ cup powdered sugar
- ½ teaspoon vanilla extract
- ¼ teaspoon ground cinnamon
- ¼ cup mini chocolate chips
For Garnish:
- Powdered sugar, for dusting
- Mini chocolate chips or chopped pistachios
Preparation:
Step 1: Prepare the Cookie Dough
In a large mixing bowl, cream together the softened butter, granulated sugar, and brown sugar until light and fluffy. This step is essential for creating a tender and flavorful cookie base. Make sure the butter is at room temperature to ensure it creams smoothly with the sugars. Use an electric mixer for best results.
Step 2: Add the Egg and Vanilla
Beat in the egg and vanilla extract until well combined. The egg adds moisture and richness to the dough, while the vanilla extract enhances the overall flavor profile. Mix until the ingredients are fully incorporated.
Step 3: Combine Dry Ingredients
In a separate bowl, whisk together the all-purpose flour, baking powder, and salt. Whisking helps to evenly distribute the baking powder and salt throughout the flour, ensuring a consistent texture and rise.
Step 4: Combine Wet and Dry Ingredients
Gradually add the dry ingredients to the wet ingredients, mixing until just combined. Be careful not to overmix the dough, as this can lead to tough cookies. Mix until the flour is fully incorporated, but avoid excessive stirring.
Step 5: Form the Cookie Cups
Preheat oven to 350°F (175°C). Grease a mini muffin tin. Scoop out small portions of dough (about 1 tablespoon each). Roll into balls and press into the muffin cups to form a well. Make sure the dough is evenly distributed in each cup to ensure they bake evenly.
Step 6: Bake the Cookie Cups
Bake for 10-12 minutes, or until the edges are lightly golden. Keep an eye on the cookie cups while they are baking to prevent them from burning. The baking time may vary depending on your oven.
Step 7: Cool the Cookie Cups
Let cool in the pan for 5 minutes before transferring to a wire rack to cool completely. Allowing the cookie cups to cool slightly in the pan helps them to firm up and prevents them from breaking when you transfer them to the wire rack.
Step 8: Prepare the Cannoli Filling
While the cookie cups are cooling, prepare the cannoli filling. In a medium bowl, combine the well-drained ricotta cheese and mascarpone cheese. Ensure the ricotta cheese is thoroughly drained to prevent a runny filling. Use a cheesecloth or fine-mesh strainer to remove excess moisture. This is a crucial step for achieving the right consistency.
Step 9: Add Sweeteners and Flavorings
Add the powdered sugar, vanilla extract, and ground cinnamon to the cheese mixture. Beat until smooth and creamy. The powdered sugar adds sweetness and helps to create a smooth texture, while the vanilla extract and cinnamon enhance the flavor profile. Adjust the amount of powdered sugar to your liking, depending on how sweet you want the filling to be.
Step 10: Fold in Chocolate Chips
Gently fold in the mini chocolate chips. This adds a delightful chocolatey element to the filling, reminiscent of traditional cannoli. You can also use chopped pistachios or other nuts for a different flavor and texture.
Step 11: Assemble the Cookie Cups
Once the cookie cups are completely cooled, fill each cup with the cannoli filling. You can use a spoon or a piping bag for a more decorative presentation. A piping bag makes it easier to fill the cookie cups evenly and neatly.
Step 12: Garnish and Serve
Dust the tops of the filled cookie cups with powdered sugar. Garnish with additional mini chocolate chips or chopped pistachios for added flavor and visual appeal. Get creative with your garnishes! You can use candied fruit, chocolate shavings, or even a drizzle of chocolate sauce.
COOKING Note:
The quality of the ricotta cheese is crucial for the success of this recipe. Choose a high-quality, whole-milk ricotta cheese for the best flavor and texture. Make sure to drain it well to remove excess moisture. If you don’t have mascarpone cheese, you can substitute it with cream cheese, but keep in mind that this will slightly alter the flavor of the filling. For a richer flavor, use browned butter in the cookie dough.
Serving Suggestions:
- Serve as a dessert at parties or gatherings.
- Enjoy as a sweet treat with coffee or tea.
- Package in decorative boxes for a homemade gift.
- Serve chilled for a refreshing dessert on a warm day.
- Offer a variety of toppings for guests to customize their own cookie cups.
- Pair with a glass of dessert wine or a sweet liqueur.
Tips:
- Ensure the ricotta cheese is well-drained to prevent a runny filling.
- Do not overmix the cookie dough to avoid tough cookies.
- Allow the cookie cups to cool completely before filling to prevent the filling from melting.
- Use a piping bag for a more decorative presentation of the filling.
- Store leftover cookie cups in an airtight container in the refrigerator.
- For best results, make the filling a few hours in advance to allow the flavors to meld.
- If you don’t have a mini muffin tin, you can bake the cookies on a regular baking sheet and top them with the filling after they cool.
- To prevent the cookie cups from sticking to the muffin tin, grease it generously or use paper liners.
- If you want a more intense cinnamon flavor, add a pinch of cinnamon to the cookie dough as well.
Prep Time:
20 minutes
Cook Time:
12 minutes
Total Time:
32 minutes
Nutritional Information:
(Per Cookie Cup, estimated)
Calories:
Approximately 150-180 calories
Protein:
Approximately 3-4 grams
Sodium:
Approximately 50-70 milligrams
Note: Nutritional information is an estimate and may vary depending on the specific ingredients used.
Conclusion
These Cannoli Cookie Cups offer a fun and delicious twist on a classic Italian dessert. They are easy to make, customizable, and perfect for any occasion. With their combination of a crisp cookie base and a creamy, ricotta-based filling, they are sure to be a hit with family and friends. So, gather your ingredients, preheat your oven, and get ready to enjoy these delightful bite-sized treats. This recipe is a great way to introduce kids to baking and can be a fun activity to do together. The cookie cups can also be adapted for different dietary needs, such as gluten-free or dairy-free, by substituting the appropriate ingredients. Don’t be afraid to experiment with different flavors and toppings to create your own unique version of this classic dessert.
Questions and Answers:
Q1: Can I make the cookie cups ahead of time?
A: Yes, you can make the cookie cups ahead of time and store them in an airtight container at room temperature for up to 3 days. This is a great way to save time when preparing for a party or gathering. However, it is best to fill the cookie cups just before serving to prevent them from becoming soggy.
Q2: Can I use a different type of cheese for the filling?
A: While ricotta and mascarpone are traditional for cannoli filling, you can experiment with other soft cheeses such as cream cheese or neufchâtel. Keep in mind that this will alter the flavor and texture of the filling. If you use cream cheese, be sure to use full-fat cream cheese for the best results. You can also add a tablespoon or two of heavy cream to the filling to make it extra creamy.
Q3: How do I prevent the cookie cups from becoming soggy?
A: To prevent the cookie cups from becoming soggy, ensure they are completely cooled before filling. Also, make sure the ricotta cheese is well-drained. If you are not serving the cookie cups immediately, store the filling separately and fill the cups just before serving. You can also line the cookie cups with a thin layer of melted chocolate to create a barrier between the cookie and the filling.
Q4: Can I add other flavorings to the filling?
A: Absolutely! Feel free to add other flavorings to the filling, such as orange zest, lemon zest, almond extract, or coffee extract. This allows you to customize the flavor to your preferences. A little bit of liquor, such as amaretto or rum, can also add a nice depth of flavor.
Q5: Can I freeze these cookie cups?
A: It is not recommended to freeze the filled cookie cups, as the filling may become watery upon thawing. However, you can freeze the cookie cups separately and prepare the filling when ready to serve. To freeze the cookie cups, wrap them tightly in plastic wrap and then place them in a freezer-safe bag or container. They can be stored in the freezer for up to 2 months. When ready to serve, thaw the cookie cups at room temperature and then fill them with the prepared filling.
Q6: What can I use instead of mini chocolate chips?
A: If you’re not a fan of mini chocolate chips, or simply don’t have any on hand, there are plenty of other options! Chopped pistachios or other nuts add a delightful crunch and nutty flavor. Candied fruit provides a colorful and festive touch. You could even use chocolate shavings or a drizzle of melted chocolate for a more decadent treat.
Q7: Can I make these gluten-free?
A: Yes! Simply substitute the all-purpose flour with a gluten-free all-purpose flour blend. Be sure to choose a blend that contains xanthan gum or another binder to help give the cookies structure. The baking time may need to be adjusted slightly, so keep an eye on them.
Q8: How do I make sure my ricotta cheese is well-drained?
A: The best way to drain ricotta cheese is to line a colander with cheesecloth or a fine-mesh strainer. Place the ricotta cheese in the lined colander and set it over a bowl to catch the draining liquid. Cover the ricotta cheese with plastic wrap and place a weight on top, such as a can of beans or a small plate. Let the ricotta cheese drain in the refrigerator for at least 2 hours, or preferably overnight.
Q9: What if I don’t have a mini muffin tin?
A: If you don’t have a mini muffin tin, you can still make these cookies! Simply scoop the dough onto a regular baking sheet, leaving some space between each cookie. Bake them as directed, and then top them with the filling after they cool. They won’t be in the shape of cups, but they’ll still taste delicious!
Q10: Can I add alcohol to the filling?
A: Yes, adding a tablespoon or two of your favorite liqueur can add a wonderful depth of flavor to the cannoli filling. Amaretto, rum, or even a coffee liqueur would be delicious. Be sure to add it gradually and taste as you go, to ensure you don’t add too much.