Mini Pineapple Cakes – Tropical Delight Recipe
Description of this Recipe
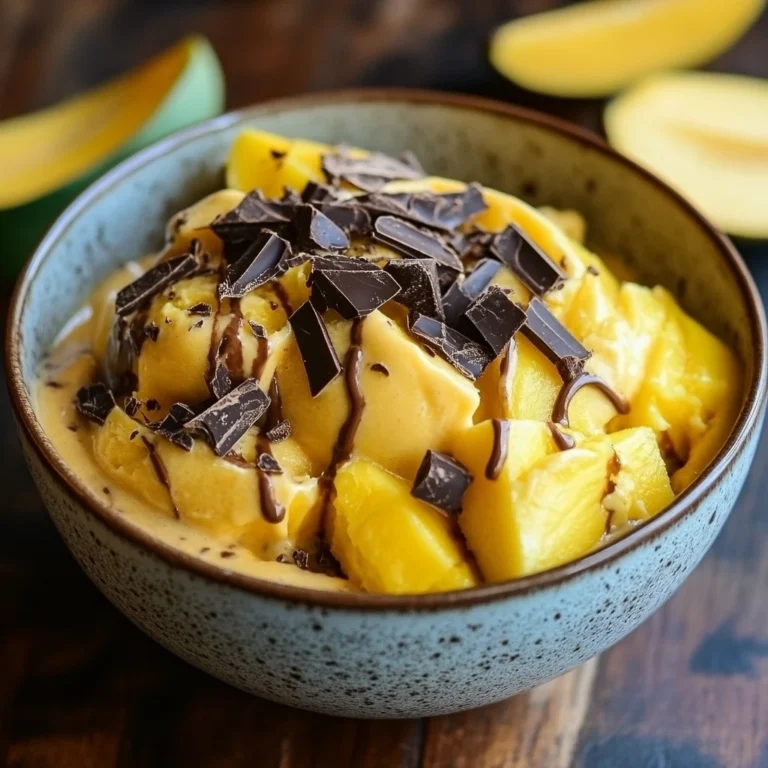
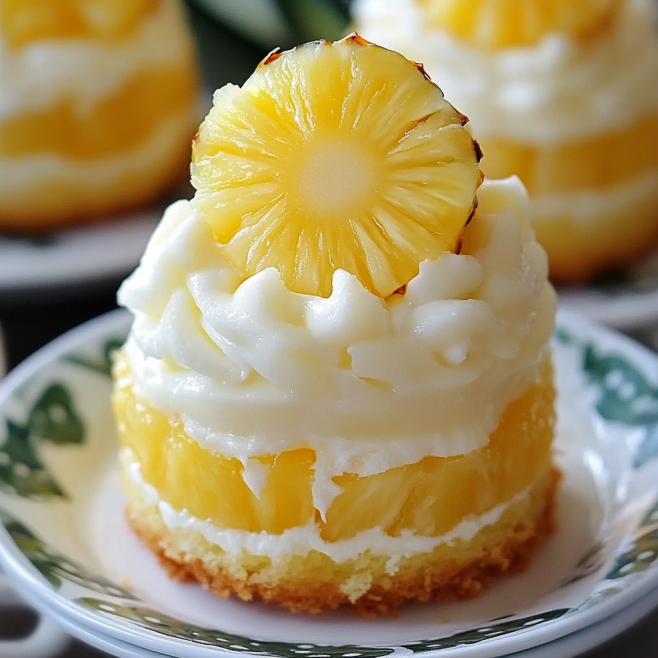
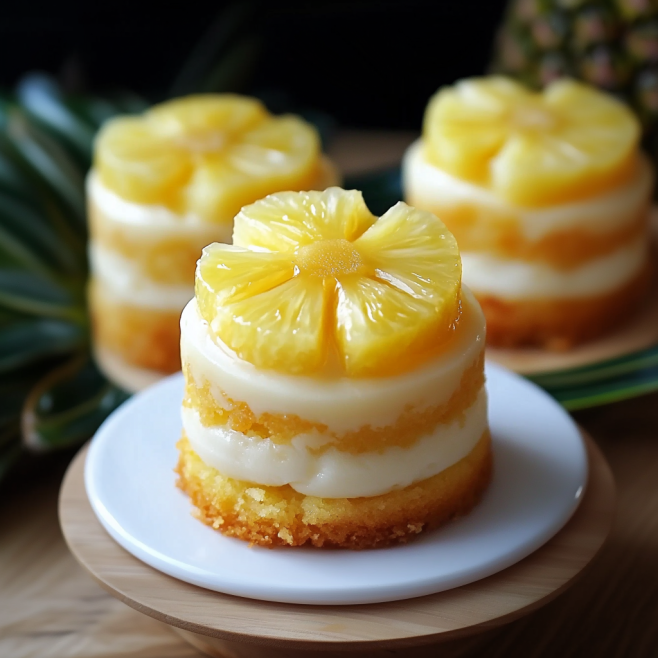
These Mini Pineapple Cakes, also known as Tropical Delight Cakes, are a scrumptious fusion of tender, moist cake infused with the vibrant flavors of pineapple. Each mini cake is layered with luscious whipped cream or frosting and adorned with fresh pineapple slices, creating a delightful tropical experience in every bite. They are perfect for summer gatherings, festive parties, or simply as a delightful treat to brighten up your day.
Why You’ll Love This Recipe
This recipe stands out for its simplicity and the incredible burst of tropical flavor it delivers. The cakes are light, fluffy, and perfectly balanced with the sweetness of pineapple and the richness of the cream. The mini size makes them ideal for individual servings, adding an elegant touch to any occasion. What’s more, the recipe is easily customizable with gluten-free and dairy-free options, ensuring that everyone can enjoy this delightful treat.
Introduction
Imagine sinking your teeth into a light, airy cake that explodes with the tangy sweetness of pineapple. These Mini Pineapple Cakes are not just a dessert; they’re a tropical escape. They bring the taste of sunshine and the spirit of the islands right to your kitchen. This recipe has been perfected over time, ensuring each cake is moist, flavorful, and visually appealing. From the initial mixing of ingredients to the final garnish of fresh pineapple, every step is designed to make baking these mini cakes a joyful experience. Whether you’re an experienced baker or a novice, this recipe is easy to follow and guarantees a delightful outcome.
Ingredients:
1 1/2 cups all-purpose flour
1/2 cup granulated sugar
1/2 cup unsalted butter, softened
1/2 cup pineapple juice (fresh or canned)
2 large eggs
1 teaspoon baking powder
1/4 teaspoon salt
1 cup whipped cream or frosting of your choice
Fresh pineapple slices for garnish
Optional Substitutions:
Use gluten-free all-purpose flour for a gluten-free version.
Substitute coconut sugar for granulated sugar to make it refined-sugar-free.
Dairy-free? Use vegan butter and coconut cream in place of regular whipped cream.
Prep:
Step 1: Preheat Your Oven and Molds
Preheat your oven to 350°F (175°C). Grease your mini cake molds or cupcake tins to prevent the batter from sticking. If you don’t have mini cake molds, standard cupcake tins will work just as well! Ensuring the molds are well-greased is crucial for easy removal and a clean presentation. You can use butter, cooking spray, or even line the molds with parchment paper liners.
Step 2: Cream the Butter and Sugar
In a mixing bowl, cream together the butter and sugar until the mixture becomes light and fluffy. This should take about 3-4 minutes of mixing on medium speed. The creamed butter-sugar base is essential for achieving a tender, fluffy cake texture. The process incorporates air into the mixture, which translates to a lighter, more delicate crumb.
Step 3: Add the Eggs
Add the eggs one at a time, mixing well after each addition. Be sure to scrape down the sides of the bowl to ensure all ingredients are well combined. Adding eggs gradually helps them emulsify properly with the butter-sugar mixture, creating a stable base for the cake.
Step 4: Sift the Dry Ingredients
In a separate bowl, sift together the flour, baking powder, and salt. Sifting helps aerate the dry ingredients, making the cakes even lighter and fluffier. This step is important because it eliminates any lumps and ensures that the baking powder is evenly distributed, leading to a uniform rise in the oven.
Step 5: Alternate Adding Wet and Dry Ingredients
Gradually add the flour mixture to the butter mixture, alternating with the pineapple juice. Begin and end with the flour mixture, mixing until just combined. Be careful not to overmix, as this can make the cakes dense. Overmixing develops the gluten in the flour, resulting in a tough cake. The key is to mix just until the ingredients are incorporated.
Step 6: Bake the Mini Cakes
Pour the batter evenly into the prepared mini cake molds or cupcake tins, filling each about two-thirds full. Bake for 18-20 minutes, or until a toothpick inserted in the center comes out clean. Once baked, let the cakes cool completely on a wire rack. Allowing the cakes to cool completely prevents them from falling apart when you slice and frost them.
Step 7: Assemble the Mini Pineapple Cakes
Once the cakes have cooled, carefully slice each cake horizontally into two layers. Spread whipped cream or your frosting of choice between the layers and on top of the cakes. For an added tropical touch, garnish with a fresh pineapple slice on top. The presentation is just as important as the taste. Arrange the pineapple slices artfully for an elegant finish.
COOK Rating:
5/5 Stars – This recipe is a winner, delivering consistent results and exceptional flavor every time. It’s easy enough for beginners but impressive enough for special occasions.
Serving Suggestions:
Serve these mini cakes alongside a tropical fruit salad for a fresh, summery dessert.
Pair them with a chilled glass of sparkling pineapple or coconut water for a refreshing treat.
Add a scoop of vanilla ice cream on the side for a decadent, indulgent dessert.
These cakes are perfect for backyard BBQs, tropical-themed parties, or simply enjoying as a light dessert after dinner.
They can also be served with a drizzle of caramel sauce or a sprinkle of toasted coconut flakes for added flair.
Tips:
Use Fresh Pineapple Juice: For the best flavor, opt for fresh pineapple juice rather than canned. Fresh juice will give your cakes a more vibrant and natural pineapple flavor. If fresh juice is not available, choose a high-quality canned juice without added sugars or preservatives.
Don’t Overmix the Batter: Overmixing can cause the cakes to become dense rather than light and fluffy. Mix just until the ingredients are combined. A light hand is key to achieving the perfect texture.
Room Temperature Ingredients: Ensure that your butter and eggs are at room temperature before you start. This helps the ingredients blend together more smoothly, resulting in a better cake texture. Room temperature butter creams more easily, and room temperature eggs emulsify better, creating a smoother batter.
For an extra burst of flavor, consider adding a tablespoon of shredded coconut to the batter.
If you want a richer flavor, use brown butter instead of regular softened butter. Brown butter adds a nutty, caramelized note that complements the pineapple beautifully.
To prevent the cakes from sticking, dust the greased molds with flour before adding the batter. This creates an extra layer of protection.
Prep Time:
20 minutes
Cook Time:
18-20 minutes
Total Time:
40 minutes
Nutrition Information:
Calories: 250
Protein: 3g
Sodium: 150mg
Conclusion
These Mini Pineapple Cakes are a true testament to the magic that happens when simple ingredients come together in perfect harmony. With their tropical flavors, light texture, and delightful presentation, they are sure to be a hit at any gathering or a special treat for yourself. The versatility of this recipe allows for endless customization, so feel free to experiment with different frostings, garnishes, and flavor additions to create your own signature version. Happy baking!
Write 5 questions and answers about this recipe.
Q1: Can I make these cakes ahead of time?
A1: Yes, you can bake the cakes ahead of time and store them in an airtight container at room temperature for up to two days. However, it’s best to frost and garnish them just before serving to maintain their freshness and appearance.
Q2: What can I use if I don’t have pineapple juice?
A2: If you don’t have pineapple juice, you can substitute it with apple juice or even orange juice. However, the pineapple flavor will be less pronounced. For a stronger pineapple flavor, consider using pineapple extract in addition to the juice substitute.
Q3: Can I use a different type of flour?
A3: Yes, you can use other types of flour such as whole wheat flour or almond flour, but the texture of the cakes may be slightly different. If using almond flour, you may need to adjust the amount of liquid to achieve the right consistency. Gluten-free all-purpose flour is a great option for those with gluten sensitivities.
Q4: How do I prevent the cakes from drying out?
A4: To prevent the cakes from drying out, make sure not to overbake them. Check for doneness at the 18-minute mark by inserting a toothpick into the center. If the toothpick comes out clean or with a few moist crumbs, the cakes are done. Also, store the baked cakes in an airtight container to retain their moisture.
Q5: Can I freeze these mini pineapple cakes?
A5: Yes, you can freeze these cakes. Wrap them individually in plastic wrap and then place them in a freezer-safe bag or container. They can be stored in the freezer for up to 2 months. When ready to serve, thaw them in the refrigerator overnight and frost them before serving.
Mini Pineapple Cakes – Tropical Delight Recipe
Ingredients
Method
- Step 1: Preheat Your Oven and Molds
- Preheat your oven to 350°F (175°C). Grease your mini cake molds or cupcake tins to prevent the batter from sticking. If you don’t have mini cake molds, standard cupcake tins will work just as well! Ensuring the molds are well-greased is crucial for easy removal and a clean presentation. You can use butter, cooking spray, or even line the molds with parchment paper liners.
- Step 2: Cream the Butter and Sugar
- In a mixing bowl, cream together the butter and sugar until the mixture becomes light and fluffy. This should take about 3-4 minutes of mixing on medium speed. The creamed butter-sugar base is essential for achieving a tender, fluffy cake texture. The process incorporates air into the mixture, which translates to a lighter, more delicate crumb.
- Step 3: Add the Eggs
- Add the eggs one at a time, mixing well after each addition. Be sure to scrape down the sides of the bowl to ensure all ingredients are well combined. Adding eggs gradually helps them emulsify properly with the butter-sugar mixture, creating a stable base for the cake.
- Step 4: Sift the Dry Ingredients
- In a separate bowl, sift together the flour, baking powder, and salt. Sifting helps aerate the dry ingredients, making the cakes even lighter and fluffier. This step is important because it eliminates any lumps and ensures that the baking powder is evenly distributed, leading to a uniform rise in the oven.
- Step 5: Alternate Adding Wet and Dry Ingredients
- Gradually add the flour mixture to the butter mixture, alternating with the pineapple juice. Begin and end with the flour mixture, mixing until just combined. Be careful not to overmix, as this can make the cakes dense. Overmixing develops the gluten in the flour, resulting in a tough cake. The key is to mix just until the ingredients are incorporated.
- Step 6: Bake the Mini Cakes
- Pour the batter evenly into the prepared mini cake molds or cupcake tins, filling each about two-thirds full. Bake for 18-20 minutes, or until a toothpick inserted in the center comes out clean. Once baked, let the cakes cool completely on a wire rack. Allowing the cakes to cool completely prevents them from falling apart when you slice and frost them.
- Step 7: Assemble the Mini Pineapple Cakes
- Once the cakes have cooled, carefully slice each cake horizontally into two layers. Spread whipped cream or your frosting of choice between the layers and on top of the cakes. For an added tropical touch, garnish with a fresh pineapple slice on top. The presentation is just as important as the taste. Arrange the pineapple slices artfully for an elegant finish.