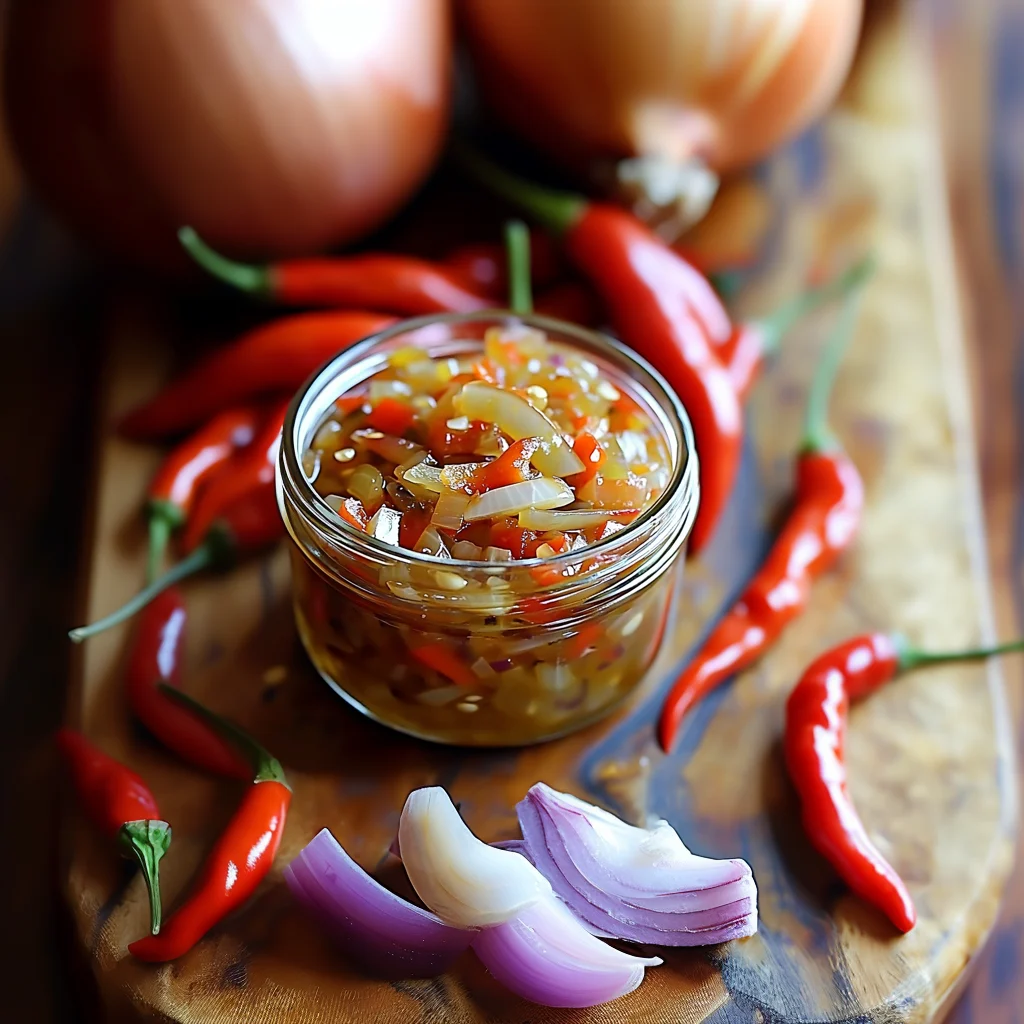
Pickled Pepper and Onion Relish
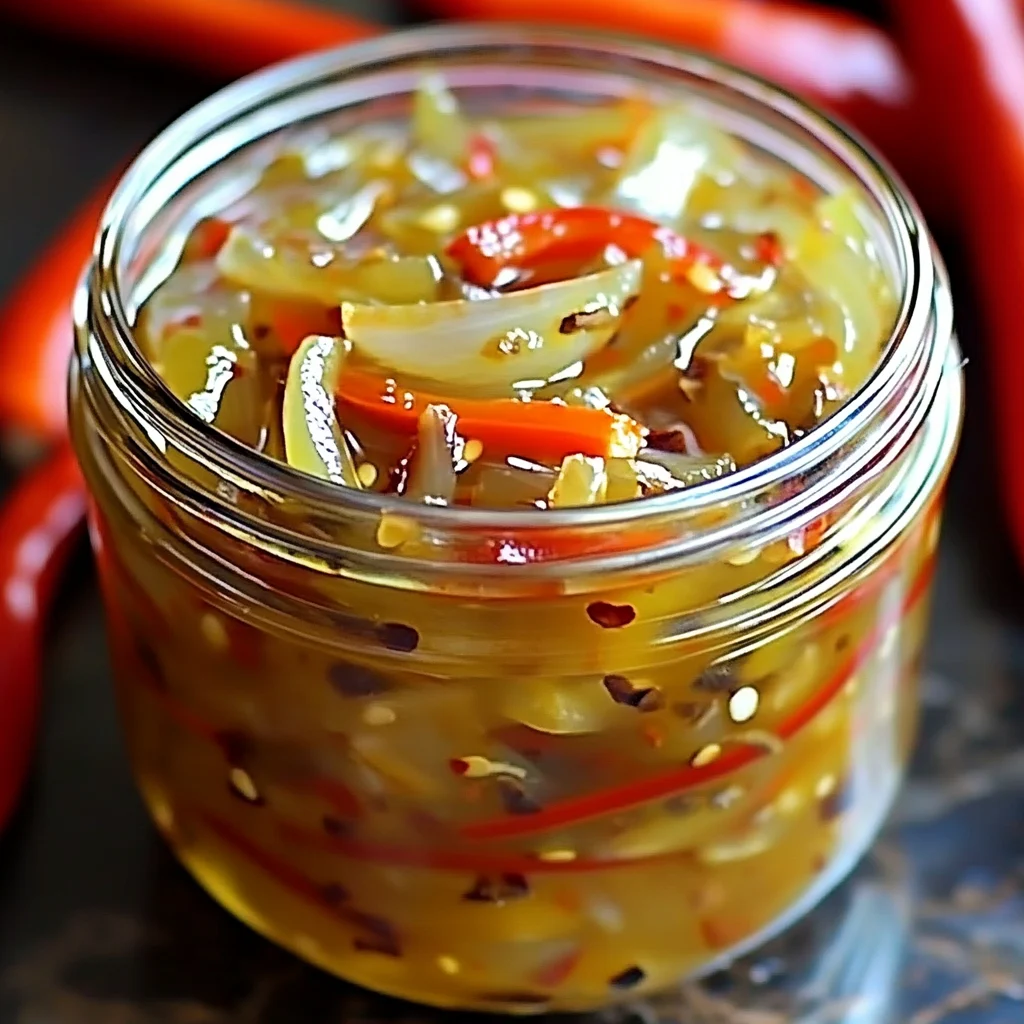
This vibrant Pickled Pepper and Onion Relish is a delightful condiment that adds a burst of flavor to almost any dish. Sweet bell peppers and pungent onions are transformed into a tangy and slightly sweet treat with the help of a simple pickling brine. The addition of mustard seeds, celery seeds, and a touch of turmeric gives it a unique depth of flavor that will tantalize your taste buds. This relish is incredibly versatile and can be used to elevate sandwiches, burgers, salads, grilled meats, and even cheese boards.
Why You’ll Love This Recipe
- Flavorful and Versatile: The combination of sweet, tangy, and savory flavors makes this relish a perfect accompaniment to a wide variety of dishes.
- Easy to Make: This recipe requires minimal effort and simple ingredients, making it a great option for both beginner and experienced cooks.
- Long-Lasting: Pickling preserves the vegetables, allowing you to enjoy this relish for several weeks when stored properly in the refrigerator.
- Homemade Goodness: Making your own relish ensures that you know exactly what goes into it, avoiding any artificial additives or preservatives found in store-bought versions.
- Customizable: Feel free to adjust the spices and seasonings to your liking, creating a relish that perfectly suits your palate.
Ingredients:
- → Vegetables
- 4 cups mixed bell peppers (red, yellow, orange, green), sliced into thin strips
- 2 large onions (yellow or white), thinly sliced into half-moons
- → Pickling Liquid
- 1 cup white vinegar
- 1 cup apple cider vinegar
- 1 cup granulated sugar
- → Spices & Seasonings
- 1 tablespoon whole mustard seeds
- 1 teaspoon celery seeds
- 1 teaspoon ground turmeric
- 1 teaspoon salt
- 1/2 teaspoon freshly ground black pepper
- 1/2 teaspoon red pepper flakes (optional, for heat)
Preparation:
Step 1: Prepare the Vegetables
Grab a large mixing bowl and combine the thinly sliced bell peppers and onions. Toss them gently to ensure they are evenly mixed. This step ensures that the pickling liquid will penetrate all the vegetables evenly.
Step 2: Make the Pickling Brine
In a medium saucepan, combine the white vinegar, apple cider vinegar, granulated sugar, mustard seeds, celery seeds, ground turmeric, salt, black pepper, and red pepper flakes (if using). The combination of white and apple cider vinegar provides a balanced tanginess, while the sugar adds a touch of sweetness to complement the vegetables. The spices infuse the brine with aromatic flavors that enhance the overall taste of the relish.
Step 3: Heat the Brine
Place the saucepan over medium heat and bring the mixture to a gentle boil, stirring occasionally. Continue to stir until the sugar granules are completely dissolved. This ensures a smooth and consistent pickling liquid. Be careful not to overheat the brine, as this can affect the texture and flavor of the relish.
Step 4: Combine Vegetables and Brine
Carefully pour the hot vinegar mixture over the peppers and onions in the mixing bowl. Stir gently to ensure all the vegetables are thoroughly coated in the pickling liquid. The heat from the brine will help to soften the vegetables and draw out their natural flavors.
Step 5: Cool and Transfer
Allow the relish to cool to room temperature. This step is crucial as it prevents condensation from forming inside the jars, which can lead to spoilage. Once cooled, transfer the relish to clean glass jars or containers with tight-fitting lids.
Step 6: Refrigerate and Wait
Refrigerate the relish for at least 24 hours before serving. This allows the flavors to meld and develop, creating a more complex and satisfying taste. While you can technically eat it sooner, the wait is well worth it! The longer it sits, the better it becomes.
Tips for Success
- Use Fresh, High-Quality Vegetables: Choose bell peppers that are firm and vibrant in color. Opt for fresh onions that are free from blemishes. The quality of your ingredients will directly impact the flavor of the relish.
- Slice the Vegetables Thinly: Thinly sliced vegetables will absorb the pickling liquid more readily, resulting in a more flavorful and tender relish.
- Don’t Overcook the Brine: Overcooking the brine can result in a bitter or overly acidic flavor. Heat it gently until the sugar is dissolved, and then remove it from the heat.
- Use Clean Jars: Ensure that your jars are clean and sterilized to prevent the growth of harmful bacteria. You can sterilize them by boiling them in water for 10 minutes or by running them through a dishwasher cycle.
- Store Properly: Store the relish in the refrigerator for up to several weeks. Make sure the lid is tightly sealed to prevent spoilage.
Serving Suggestions
- Sandwiches and Burgers: Add a spoonful of this relish to your favorite sandwiches and burgers for a burst of flavor and texture.
- Grilled Meats: Serve it alongside grilled chicken, steak, or pork for a tangy and refreshing contrast.
- Salads: Incorporate it into salads for a zesty and colorful addition.
- Cheese Boards: Pair it with cheeses and crackers for a sophisticated and flavorful appetizer.
- Tacos and Wraps: Add it to tacos and wraps for a unique and flavorful twist.
- Hot Dogs and Sausages: A classic pairing that never disappoints.
Variations
- Spicy: Add more red pepper flakes or a pinch of cayenne pepper for extra heat. You can also include a finely chopped jalapeño pepper.
- Sweet: Add a touch more sugar or a drizzle of honey for a sweeter relish.
- Herby: Add fresh herbs such as dill, parsley, or oregano for a more aromatic flavor.
- Garlicky: Add a clove or two of minced garlic to the pickling brine for a pungent and savory flavor.
Enjoy this delicious Pickled Pepper and Onion Relish! This recipe is a celebration of simple ingredients transformed into a complex and flavorful condiment. The combination of sweet peppers, pungent onions, and tangy brine creates a symphony of flavors that will elevate your culinary creations. So, gather your ingredients, follow the steps, and prepare to be amazed by the homemade goodness of this delightful relish!
Pickled Pepper and Onion Relish
Ingredients
Method
- Step 1: Prepare the Chicken
- Remove the chicken from the refrigerator about 30 minutes before you plan to start cooking. This allows the chicken to come closer to room temperature, which promotes more even cooking. Preheat your oven to 425°F (220°C). Rinse the chicken inside and out with cold water and pat it dry thoroughly with paper towels. Removing excess moisture will help the skin crisp up during roasting.
- Step 2: Make the Herb Butter
- In a small bowl, combine the softened butter, chopped parsley, chopped rosemary, chopped thyme, minced garlic, lemon zest, salt, and black pepper. Use a fork to mash all the ingredients together until well combined, creating a flavorful herb butter.
- Step 3: Season the Chicken
- Using your fingers, gently loosen the skin of the chicken breast, starting at the neck cavity. Be careful not to tear the skin. Spread about two-thirds of the herb butter under the skin, directly onto the chicken breast meat. This will infuse the meat with flavor and help keep it moist. Rub the remaining herb butter all over the outside of the chicken, ensuring it’s evenly coated.
- Step 4: Stuff the Cavity
- Place the halved lemon, quartered onion, smashed garlic cloves, rosemary sprigs, and thyme sprigs inside the chicken’s cavity. These aromatics will release their flavors during roasting, adding depth and complexity to the chicken.
- Step 5: Prepare the Vegetables (Optional)
- If you’re using vegetables, toss the baby potatoes and chopped carrots with a drizzle of olive oil, salt, and pepper. Spread them evenly in the bottom of a roasting pan. This creates a bed for the chicken and allows the vegetables to roast alongside, absorbing the flavorful chicken drippings.
- Step 6: Roast the Chicken
- Place the chicken on top of the vegetables in the roasting pan (or directly in the pan if you’re not using vegetables). Roast in the preheated oven for 1 hour and 15 minutes to 1 hour and 30 minutes, or until the internal temperature of the thickest part of the thigh reaches 165°F (74°C). Use a meat thermometer to ensure accurate doneness.
- Step 7: Baste the Chicken
- About halfway through the roasting time (after about 45 minutes), baste the chicken with the pan drippings. This helps keep the skin moist and promotes even browning.
- Step 8: Rest the Chicken
- Once the chicken is cooked through, remove it from the oven and let it rest for 10-15 minutes before carving. This allows the juices to redistribute throughout the meat, resulting in a more tender and flavorful chicken. Tent the chicken loosely with foil while it rests to keep it warm.
- Step 9: Carve and Serve
- Transfer the chicken to a cutting board and carve it into serving pieces. Arrange the carved chicken on a platter, surrounded by the roasted vegetables (if using). Spoon some of the pan drippings over the chicken for added flavor and moisture. Garnish with fresh herbs, if desired.
