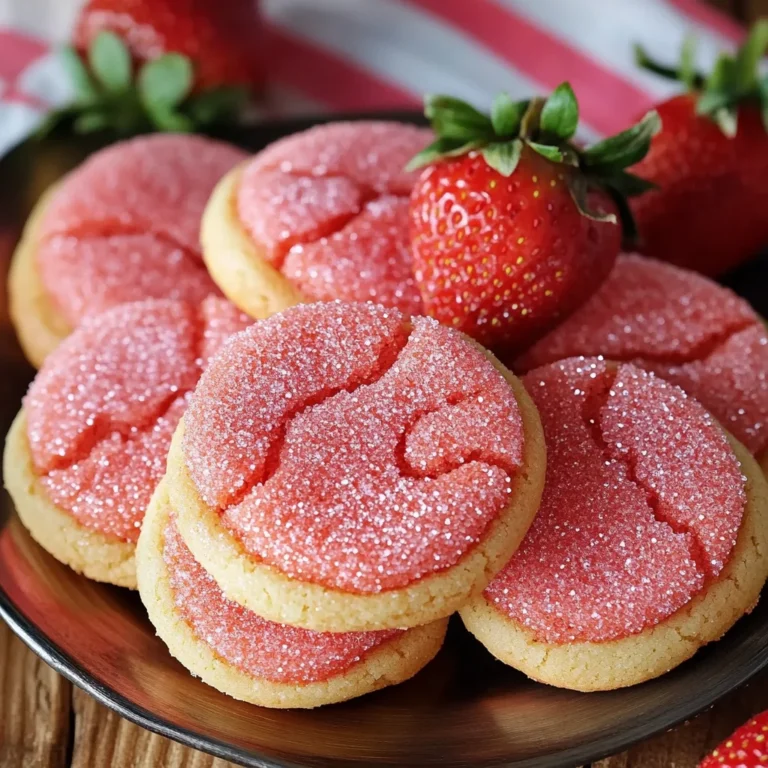
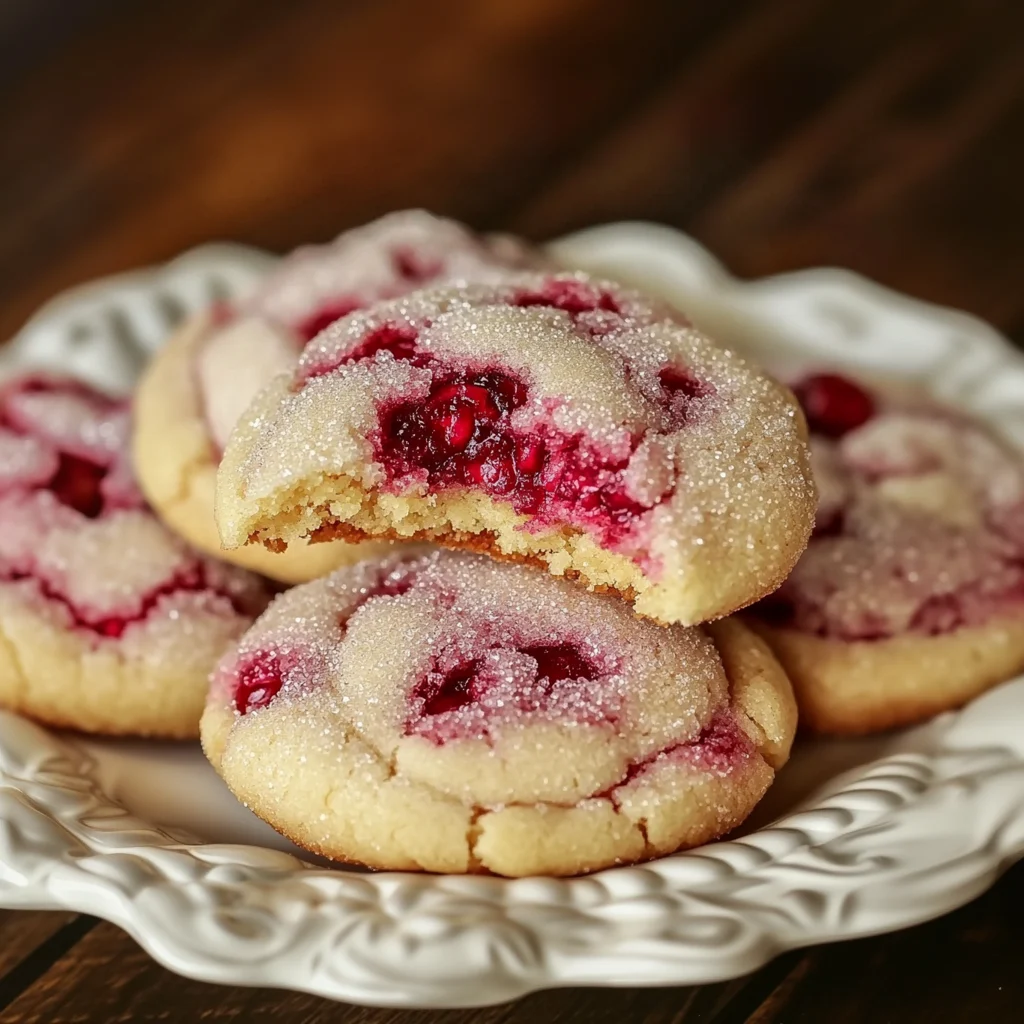
Soft and Chewy Raspberry Sugar Cookies
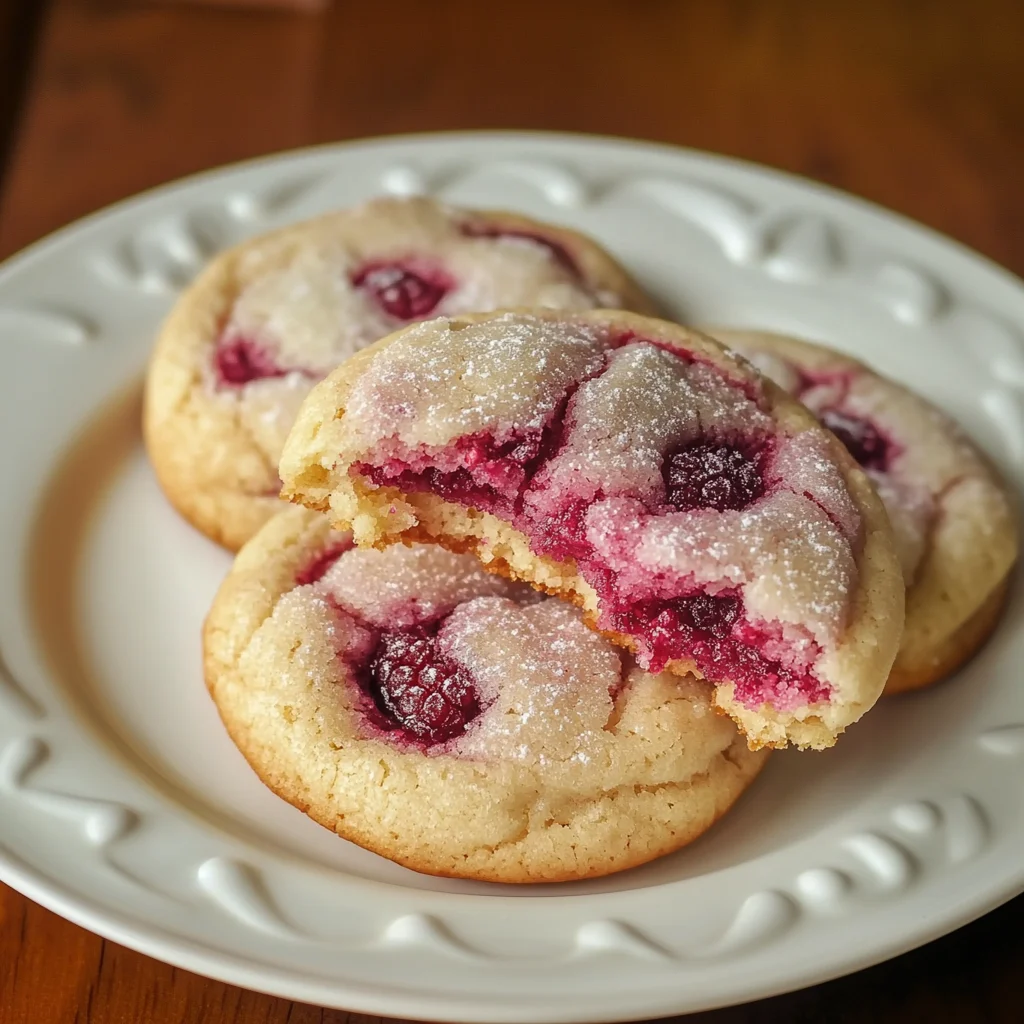
Description of this recipe: These Raspberry Sugar Cookies are a delightful twist on the classic sugar cookie, infused with the vibrant, sweet-tart flavor of fresh raspberries. The cookies boast a soft and chewy texture with slightly crisp edges, a beautiful pink hue, and are rolled in granulated sugar for added sweetness and sparkle. They are perfect for any occasion, from holiday gatherings to afternoon tea, or simply as a sweet treat to brighten your day.
Why you will love this recipe: You’ll adore these Raspberry Sugar Cookies because they are incredibly easy to make, bursting with real raspberry flavor, and have the perfect soft and chewy consistency. The homemade raspberry syrup adds a unique depth of flavor, while the chopped raspberries scattered throughout create bursts of juicy sweetness. The dough is freezer-friendly, allowing you to bake a fresh batch whenever the craving strikes. These cookies are not only delicious but also visually appealing, making them a delightful gift for friends and family. Plus, the recipe is easily adaptable for gluten-free diets, ensuring everyone can enjoy these delightful treats.
Introduction
Sugar cookies have always held a special place in the realm of baking. Their simple yet satisfying flavor makes them a timeless classic. But what happens when you infuse that classic flavor with the bright, fruity essence of fresh raspberries? You get these Soft and Chewy Raspberry Sugar Cookies. This recipe takes the traditional sugar cookie to a whole new level, adding a burst of summer flavor and a beautiful pink hue that’s as pleasing to the eye as it is to the palate.
The key to these cookies lies in the homemade raspberry syrup, which not only adds intense raspberry flavor but also contributes to the cookie’s incredibly soft and chewy texture. This syrup is made by simmering fresh or frozen raspberries with sugar until they break down into a luscious, concentrated liquid. The syrup is then strained to remove the seeds, resulting in a smooth, flavorful base for the cookie dough.
But the raspberry goodness doesn’t stop there. We also incorporate chopped fresh raspberries directly into the dough, adding little pockets of juicy sweetness that burst in your mouth with every bite. The combination of the raspberry syrup and chopped raspberries creates a symphony of flavor that’s both sweet and tart, perfectly balanced and utterly irresistible.
Whether you’re a seasoned baker or just starting, this recipe is incredibly easy to follow. The dough comes together quickly, and the chilling process ensures that the cookies hold their shape in the oven and develop that signature soft and chewy texture. So, preheat your oven, gather your ingredients, and get ready to experience the joy of baking these incredible Raspberry Sugar Cookies. They’re guaranteed to become a new favorite in your recipe repertoire.
Ingredients:
For the Raspberry Syrup
- 1 cup frozen raspberries
- ¼ cup granulated sugar
For the Cookies
- 2 cups gluten-free flour (1:1 multipurpose flour with xanthan gum)
- 1 ½ tablespoons cornstarch
- 1 ½ teaspoons baking powder
- ½ teaspoon kosher salt
- ½ cup unsalted butter or vegan baking stick (room temperature)
- 1 ¼ cups + 2 tablespoons granulated sugar (reserve 2 tablespoons for rolling)
- 2 tablespoons cornstarch mixed with 3 tablespoons water
- 3 tablespoons milk (dairy or non-dairy)
- 3 tablespoons raspberry syrup (from above)
- 3 drops red food coloring (optional)
- ½ cup frozen raspberries, chopped into small pieces
Preparation:
Step 1: Make the Raspberry Syrup
In a medium saucepan over medium heat, combine the frozen raspberries and sugar. Cook, stirring constantly, for about 10 minutes until the raspberries break down and the mixture becomes syrupy. Ensure the mixture doesn’t burn; lower the heat if necessary.
Step 2: Strain the Syrup
Strain the raspberry mixture through a fine-mesh strainer into a bowl. Use a spoon or spatula to press the solids against the strainer to extract as much syrup as possible. Let the syrup cool completely. Reserve 2-3 tablespoons of the syrup for the cookie dough. The remaining syrup can be used for other culinary creations, such as drizzling over pancakes or ice cream.
Step 3: Prepare the Raspberries
Chop ½ cup of frozen raspberries into small pieces. Place the chopped raspberries in a small bowl and return them to the freezer. This will help them stay firm and prevent them from bleeding into the dough too much during baking.
Step 4: Combine Dry Ingredients
In a large bowl, whisk together the gluten-free flour, cornstarch, baking powder, and salt. Whisking ensures that the ingredients are evenly distributed, which is essential for a consistent cookie texture.
Step 5: Mix Cornstarch Slurry
In a small bowl, mix the cornstarch with water until smooth. This slurry acts as a binder and helps create a soft and chewy texture in the cookies.
Step 6: Cream Butter and Sugar
In a large mixing bowl, using a mixer (either stand mixer or hand mixer), cream together the softened butter and 1 ¼ cups of granulated sugar until light and fluffy. This process should take about 3 minutes. Creaming incorporates air into the butter and sugar mixture, which contributes to the cookies’ light and airy texture.
Step 7: Add Wet Ingredients
Gradually mix in the cornstarch-water mixture, milk, and cooled raspberry syrup into the creamed butter and sugar. Mix until well combined. Add red food coloring, if desired, for a more vibrant pink color.
Step 8: Incorporate Dry Ingredients
Slowly add the flour mixture to the wet ingredients, mixing on low speed until just combined. Be careful not to overmix the dough, as this can result in tough cookies.
Step 9: Fold in Raspberries
Gently fold in the chopped frozen raspberries into the dough. Ensure the raspberries are evenly distributed throughout the dough.
Step 10: Chill the Dough
Cover the dough tightly with plastic wrap and freeze it for at least 1 hour. Chilling the dough is crucial for preventing the cookies from spreading too much during baking.
Step 11: Preheat Oven and Prepare Baking Sheet
Preheat the oven to 325°F (160°C). Line a baking sheet with parchment paper. Parchment paper prevents the cookies from sticking to the baking sheet and makes cleanup easier.
Step 12: Shape and Roll the Cookies
Scoop the chilled dough into balls, about 1-1.5 inches in diameter. Roll each ball in the reserved 2 tablespoons of granulated sugar, coating it evenly.
Step 13: Arrange on Baking Sheet
Place the sugar-coated dough balls 3-4 inches apart on the prepared baking sheet. This spacing allows the cookies to spread slightly without running into each other.
Step 14: Bake the Cookies
Bake for 15 minutes, or until the edges are lightly golden and the centers are set.
Step 15: Reshape and Cool
Immediately after removing the cookies from the oven, gently reshape them with a spatula if necessary. This helps to create a more uniform shape. Cool the cookies on the baking sheet for 5 minutes before transferring them to a wire rack to cool completely.
COOKING Rating:
5/5 Stars
Serving Suggestions:
These Raspberry Sugar Cookies are delicious on their own, but they can also be served in a variety of ways:
- With a glass of milk: A classic pairing that’s always a hit.
- Alongside a cup of tea or coffee: Perfect for an afternoon treat.
- As part of a dessert platter: Combine with other cookies, brownies, and pastries for a festive spread.
- As an ice cream sandwich: Use the cookies as a base for a scoop of vanilla or raspberry ice cream.
- Decorated with icing: Add a touch of elegance by decorating the cooled cookies with royal icing or buttercream frosting.
Tips:
- Use Room Temperature Butter: Make sure your butter is softened to room temperature before creaming it with sugar. This will help ensure that the mixture is light and fluffy.
- Don’t Overmix the Dough: Overmixing can lead to tough cookies. Mix the dry ingredients into the wet ingredients until just combined.
- Chill the Dough: Chilling the dough is essential for preventing the cookies from spreading too much during baking.
- Use Parchment Paper: Parchment paper prevents the cookies from sticking to the baking sheet and makes cleanup easier.
- Store Properly: Store the cooled cookies in an airtight container at room temperature for up to 5 days.
Prep Time:
20 minutes
Cook Time:
15 minutes
Total Time:
1 hour 35 minutes (including chilling time)
Nutritional Information:
(Note: Nutritional information is an estimate and may vary based on specific ingredients and portion sizes.)
Calories: Approximately 150-180 per cookie
Protein: 1-2 grams per cookie
Sodium: 50-70mg per cookie
Conclusion
These Soft and Chewy Raspberry Sugar Cookies are a delightful treat that’s perfect for any occasion. With their vibrant raspberry flavor, soft texture, and beautiful pink hue, they’re sure to impress your friends and family. So, give this recipe a try and experience the joy of baking these incredible cookies. You won’t be disappointed!
Questions and Answers about this Recipe:
Q1: Can I use fresh raspberries instead of frozen?
A: Yes, you can use fresh raspberries instead of frozen, but frozen raspberries are generally recommended because they tend to hold their shape better during baking and don’t bleed as much color into the dough. If using fresh raspberries, make sure they are firm and not overly ripe.
Q2: Can I make this recipe without gluten-free flour?
A: Absolutely! If you don’t need the cookies to be gluten-free, you can substitute the gluten-free flour with regular all-purpose flour. The texture of the cookies may be slightly different, but they will still be delicious.
Q3: How do I prevent the cookies from spreading too much in the oven?
A: The key to preventing cookies from spreading is to chill the dough thoroughly before baking. Make sure to freeze the dough for at least 1 hour, or even longer if possible. Additionally, ensure that your oven is not too hot, as excessive heat can cause the cookies to spread more quickly.
Q4: Can I add white chocolate chips to this recipe?
A: Yes, adding white chocolate chips would be a delicious addition to these Raspberry Sugar Cookies! Simply fold in about ½ cup of white chocolate chips along with the chopped raspberries.
Q5: How should I store the leftover cookies?
A: To keep your Raspberry Sugar Cookies fresh and delicious, store them in an airtight container at room temperature. They will stay soft and chewy for up to 5 days. You can also freeze the baked cookies for longer storage. Just make sure they are completely cooled before freezing, and thaw them at room temperature before serving.
Soft and Chewy Raspberry Sugar Cookies
Ingredients
Method
- Step 1: Make the Raspberry Syrup
- In a medium saucepan over medium heat, combine the frozen raspberries and sugar. Cook, stirring constantly, for about 10 minutes until the raspberries break down and the mixture becomes syrupy. Ensure the mixture doesn’t burn; lower the heat if necessary.
- Step 2: Strain the Syrup
- Strain the raspberry mixture through a fine-mesh strainer into a bowl. Use a spoon or spatula to press the solids against the strainer to extract as much syrup as possible. Let the syrup cool completely. Reserve 2-3 tablespoons of the syrup for the cookie dough. The remaining syrup can be used for other culinary creations, such as drizzling over pancakes or ice cream.
- Step 3: Prepare the Raspberries
- Chop ½ cup of frozen raspberries into small pieces. Place the chopped raspberries in a small bowl and return them to the freezer. This will help them stay firm and prevent them from bleeding into the dough too much during baking.
- Step 4: Combine Dry Ingredients
- In a large bowl, whisk together the gluten-free flour, cornstarch, baking powder, and salt. Whisking ensures that the ingredients are evenly distributed, which is essential for a consistent cookie texture.
- Step 5: Mix Cornstarch Slurry
- In a small bowl, mix the cornstarch with water until smooth. This slurry acts as a binder and helps create a soft and chewy texture in the cookies.
- Step 6: Cream Butter and Sugar
- In a large mixing bowl, using a mixer (either stand mixer or hand mixer), cream together the softened butter and 1 ¼ cups of granulated sugar until light and fluffy. This process should take about 3 minutes. Creaming incorporates air into the butter and sugar mixture, which contributes to the cookies’ light and airy texture.
- Step 7: Add Wet Ingredients
- Gradually mix in the cornstarch-water mixture, milk, and cooled raspberry syrup into the creamed butter and sugar. Mix until well combined. Add red food coloring, if desired, for a more vibrant pink color.
- Step 8: Incorporate Dry Ingredients
- Slowly add the flour mixture to the wet ingredients, mixing on low speed until just combined. Be careful not to overmix the dough, as this can result in tough cookies.
- Step 9: Fold in Raspberries
- Gently fold in the chopped frozen raspberries into the dough. Ensure the raspberries are evenly distributed throughout the dough.
- Step 10: Chill the Dough
- Cover the dough tightly with plastic wrap and freeze it for at least 1 hour. Chilling the dough is crucial for preventing the cookies from spreading too much during baking.
- Step 11: Preheat Oven and Prepare Baking Sheet
- Preheat the oven to 325°F (160°C). Line a baking sheet with parchment paper. Parchment paper prevents the cookies from sticking to the baking sheet and makes cleanup easier.
- Step 12: Shape and Roll the Cookies
- Scoop the chilled dough into balls, about 1-1.5 inches in diameter. Roll each ball in the reserved 2 tablespoons of granulated sugar, coating it evenly.
- Step 13: Arrange on Baking Sheet
- Place the sugar-coated dough balls 3-4 inches apart on the prepared baking sheet. This spacing allows the cookies to spread slightly without running into each other.
- Step 14: Bake the Cookies
- Bake for 15 minutes, or until the edges are lightly golden and the centers are set.
- Step 15: Reshape and Cool
- Immediately after removing the cookies from the oven, gently reshape them with a spatula if necessary. This helps to create a more uniform shape. Cool the cookies on the baking sheet for 5 minutes before transferring them to a wire rack to cool completely.