Step 1: Make the Raspberry Syrup
In a medium saucepan over medium heat, combine the frozen raspberries and sugar. Cook, stirring constantly, for about 10 minutes until the raspberries break down and the mixture becomes syrupy. Ensure the mixture doesn't burn; lower the heat if necessary.
Step 2: Strain the Syrup
Strain the raspberry mixture through a fine-mesh strainer into a bowl. Use a spoon or spatula to press the solids against the strainer to extract as much syrup as possible. Let the syrup cool completely. Reserve 2-3 tablespoons of the syrup for the cookie dough. The remaining syrup can be used for other culinary creations, such as drizzling over pancakes or ice cream.
Step 3: Prepare the Raspberries
Chop ½ cup of frozen raspberries into small pieces. Place the chopped raspberries in a small bowl and return them to the freezer. This will help them stay firm and prevent them from bleeding into the dough too much during baking.
Step 4: Combine Dry Ingredients
In a large bowl, whisk together the gluten-free flour, cornstarch, baking powder, and salt. Whisking ensures that the ingredients are evenly distributed, which is essential for a consistent cookie texture.
Step 5: Mix Cornstarch Slurry
In a small bowl, mix the cornstarch with water until smooth. This slurry acts as a binder and helps create a soft and chewy texture in the cookies.
Step 6: Cream Butter and Sugar
In a large mixing bowl, using a mixer (either stand mixer or hand mixer), cream together the softened butter and 1 ¼ cups of granulated sugar until light and fluffy. This process should take about 3 minutes. Creaming incorporates air into the butter and sugar mixture, which contributes to the cookies' light and airy texture.
Step 7: Add Wet Ingredients
Gradually mix in the cornstarch-water mixture, milk, and cooled raspberry syrup into the creamed butter and sugar. Mix until well combined. Add red food coloring, if desired, for a more vibrant pink color.
Step 8: Incorporate Dry Ingredients
Slowly add the flour mixture to the wet ingredients, mixing on low speed until just combined. Be careful not to overmix the dough, as this can result in tough cookies.
Step 9: Fold in Raspberries
Gently fold in the chopped frozen raspberries into the dough. Ensure the raspberries are evenly distributed throughout the dough.
Step 10: Chill the Dough
Cover the dough tightly with plastic wrap and freeze it for at least 1 hour. Chilling the dough is crucial for preventing the cookies from spreading too much during baking.
Step 11: Preheat Oven and Prepare Baking Sheet
Preheat the oven to 325°F (160°C). Line a baking sheet with parchment paper. Parchment paper prevents the cookies from sticking to the baking sheet and makes cleanup easier.
Step 12: Shape and Roll the Cookies
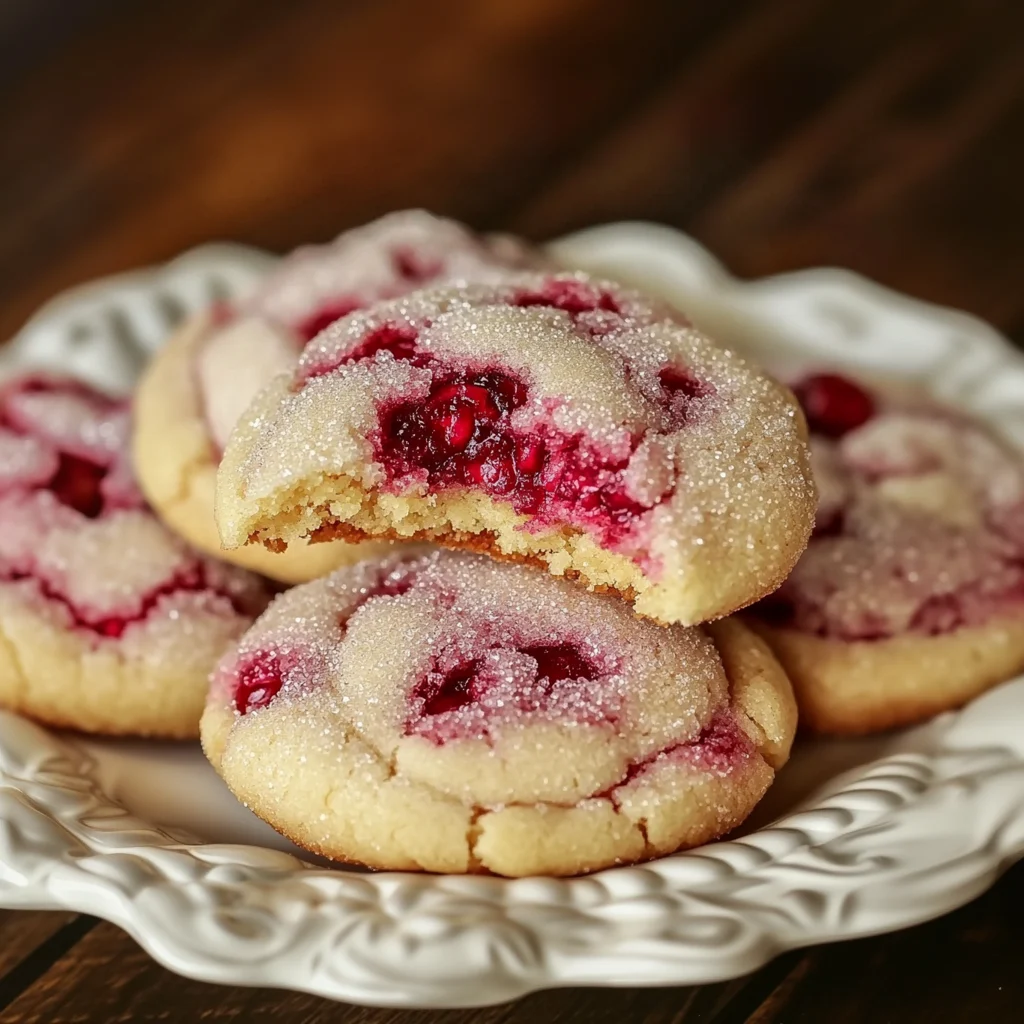
Scoop the chilled dough into balls, about 1-1.5 inches in diameter. Roll each ball in the reserved 2 tablespoons of granulated sugar, coating it evenly.
Step 13: Arrange on Baking Sheet
Place the sugar-coated dough balls 3-4 inches apart on the prepared baking sheet. This spacing allows the cookies to spread slightly without running into each other.
Step 14: Bake the Cookies
Bake for 15 minutes, or until the edges are lightly golden and the centers are set.
Step 15: Reshape and Cool
Immediately after removing the cookies from the oven, gently reshape them with a spatula if necessary. This helps to create a more uniform shape. Cool the cookies on the baking sheet for 5 minutes before transferring them to a wire rack to cool completely.